Error message “Someone is currently logged into the APC Management Web Server. Please try again later”


When you attempt to access your APC Environmental Monitoring Appliance via a web interface you receive the error "Someone is currently logged into the APC Management Web Server. Please try again later"

After confirming that no one is actually logged in it looks as though the web interface has got stuck. If near you could physically power cycle the unit to refresh the web interface. If the appliance is located some distance away the workaround is to telnet to it and then log off by selecting option 4 in the Control Console

Try accessing the web interface now and you should be able to log in as normal.

How to install SQL Server 2008 R2 Client Tools


If you want to install just SQL Server Management Studio and/or the SQL Shared Features such as Business Intelligence Development Studio, Integration Services etc then you will need to run the setup executable from the original SQL media.

Select ‘New SQL Server stand-alone installation or add features to an existing installation’ and accept the default settings to the next few screens. When you get to the ‘Feature Selection’ options completely deselect the ‘Instance Features’ (Database Engine Services/Analysis Services/Reporting Services) instead ticking the relevant ‘Shared Features’.

Continue with the installation and once complete the tools and shared features should be available in All Programs\MS SQL Server 2008 R2

Error ‘DBNETLIBConnectionOpen (Connect()).SQL Server does not exist or access denied’ with SQL Server 2008


I received this error following a SQL Instance upgrade from MSDE to SQL Server 2008 R2 Express and tried to connect to the SQL Instance remotely via a third party application.

[DBNETLIB][ConnectionOpen (Connect()).]SQL Server does not exist or access denied

Fortunately the solution was simple:

Start the SQL Server Browser service and if required change the Startup Type from Disabled to Automatic

I looked up why the SQL Server Browser service is now disabled by default and the reason is simply that it’s a security best practice to disable the service.

Error importing a Google calendar ‘Failed to import events: Could not upload your events because you do not have sufficient access on the target calendar..’


Whilst I was importing my last calendar into my main Google calendar I received this error despite being the owner of both calendars!

A quick search showed that I’m not the only one to have faced this issue. The resolution that worked for me was to open your exported .ics calendar file in a text editor such as Notepad (best to take a back up copy first) and select Edit > Replace

In the Find what: field select UID: and in the Replace with: field type UID:X (basically it can be X or replace X with any alpha-numeric character (a-z,0-9)

Save the .ics file and redo the calendar import. Now it should import without error.

How to merge Google calendars


I have a number of calendars that I used to share out and I cannot get my Windows 8 phone to display the daily entries from these calendars, only my main google calendar. As a way around this, and as the entries are static i.e. recurring birthdays, I thought I would merge these calendars into my main calendar.

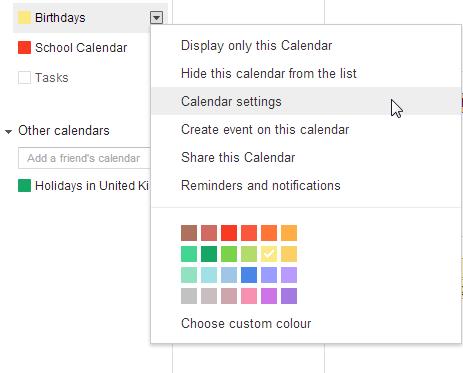
Open your Google calendar and select the drop down arrow for the calendar that you wish to import. Select Calendar Settings

Locate the Private Address: field and right click on the ICAL button and select ‘Save link as…’ This will enable us to take a copy of the whole calendar that you wish to merge

Select a location to save to and choose a name of the iCalendar file and click Save

Select Back to Calendar at either the lower or top right of the screen. Select the drop down next to Other Calendars then select Import Calendar

Select the Choose File button and locate the iCalendar file that you saved earlier. Then select the actual calendar that you want to import your other calendar into. Click Import

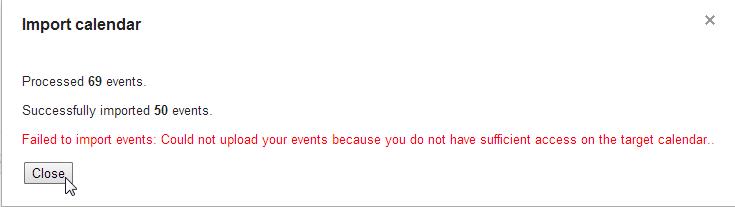
Once imported the Import Calendar will confirm whether the import was successful. Click Close

You can now confirm whether they calendars have merged – you should see double entries. Once you’re happy you can either:

– Select the drop down next to the calendar and choose to Hide this calendar from the list or
– Select the Calendar Settings of the calendar that you have merged from and in the Delete Calendar settingselect Permanently delete this calendar

‘The volume you have selected may not be extended’ error when attempting a volume extension using Diskpart


I encountered this problem trying to resize the system drive of a virtual machine. Normally I add the extra space using the vSphere client then power down the VM before adding the virtual disk as a secondary disk on another Windows 2003 VM. There I can usually run Diskpart and safely extend it, detach as a secondary drive and power up the original VM with it’s now extended system drive.

In this instance I received the error:
The volume you have selected may not be extended.
Please select another volume and try again.

After a liitle research and reading I found this which pointed me in the right direction:

http://www.edwardsd.co.uk/work/2010/05/fsextend-exe-diskpart/

I downloaded fsextend and saved into C:WindowsSystem32 and then whilst still using the Diskpart utility, ran the command:
extend filesystem

But I still received the error. I was about to run the fsextend utility directly as the only syntax it requires is fsextend (drive letter) when I realised that I would need a drive letter for the volume I was attempting to extend (I don’t normally assign a letter – the volume usually extends without)

I assigned a drive letter and whilst still in the same session of Diskpart ran extend filesystem again but this time it was successful..

I’m not sure whether simply assigning a drive letter resolved the issue or whether fsextend helped in some way.

I later found out that from Windows 2003 SP2 the Diskpart utility has the extra and originally undocumented filesystem command included natively within the utility. In theory you should not need the fsextend utility above if running the latest Windows 2003 SP2 and it may be worth assigning a drive letter temporarily to see if this resolves the extending issue in the first instance.

How to create laps on your Garmin Forerunner 305


I find that having 1 mile laps is useful and do not understand why it was never a default setting as it seems to have become one on later watches.

How to create 1 mile/km or custom laps on your Garmin Forerunner 305:

Press Mode > Training > Training Options > Auto Lap > Auto Lap Trigger (Set this to ON)
Lap at (Set this to 1 mile or 1 Km or there is also a custom setting)

Press Mode to come all the way out

There is more information here:
http://static.garmincdn.com/pumac//984_OwnersManual.pdf

How to set data fields on your Garmin Forerunner 305


Having reset my Forerunner 305 to factory defaults, I now need to apply all the settings that I previously had!

To change the fields on your display:
Press Mode > Settings > General > Data Fields
Main 1 > Select how many fields that you want to display. The default is 3, Time, Pace and Distance
I want 4 fields. Clicking ‘Enter’ button in each field allows you to select the type of data to display. Using the arrow buttons allows you to go to the next/previous field and the Mode button takes you back a step.
I want Time and Distance on the top 2 fields and Current Lap pace (Pace – Lap) and overall pace (Pace – Average) in the bottom 2 fields. Press Mode to come all the way back out.

There is more information here:
http://static.garmincdn.com/pumac//984_OwnersManual.pdf

How to factory reset your Garmin Forerunner 305


The reason I have a need for this is because in recent runs the Garmin has been reporting the correct time yet when I upload to Garmin Connect the time is often inexplicably a few minutes more. I am hoping that a factory reset of the watch will resolve this.

Important! Please note that this will erase all personalised settings and any previous training data. Back up any data before resetting.

– Power off
– Hold down both the ‘Mode’ button and the ‘Power’ button
– When the watch powers on select ‘Yes’ to ‘Do you really want to erase all the user data?’
– The watch automatically restarts and prompts to select location, time zone and other Garmin specific accessory settings